Camera wireless peripherals
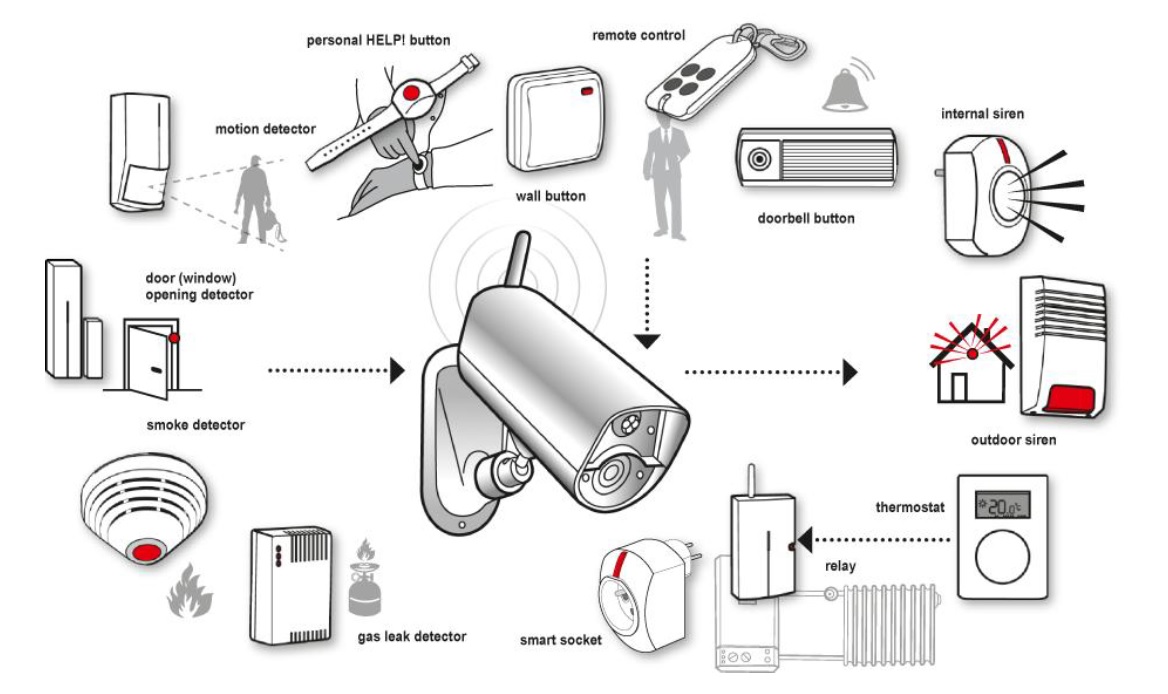
The article describes possibilities of using camera EYE-02 with wireless peripherals from the OASiS system manufactured by Jablotron Alarms. Please visit www.jablotron.com to find complete list of peripherals. When the peripherals are used with camera EYE-02, the camera plays the role of the control panel. Camera EYE-02 is equipped with 7 internal detectors and 2 virtual switches. Wireless peripherals further expand camera capabilities.
Overview of peripherals
Five types of peripherals can be used with the camera: detectors, wireless switches, wireless buttons, sirens and thermostats.
Wireless peripherals overview
Up to 20 wireless peripherals can be used with the camera at the same time. Operating range of peripherals is 100m in free space. Wireless buttons, detectors and sirens are powered by batteries with typical lifetime of at least 2 years. Exact battery lifetime depends on the battery type used and it is mentioned in the manual of each peripheral. Detectors and sirens communicate with the EYE-02 camera, i.e. they report information about device status. Camera informs the user
- when camera does not receive regular reports from the peripheral (communication with peripheral is interrupted) or camera starts receiving regular reports from the peripheral again (communication with peripheral is recovered).
- when detector battery is low or there is failure in AC power when detector is powered from the mains.
- when tampering (unauthorized manipulation) into detectors or sirens happened. Information is sent by the peripheral to the camera even when the camera is in SLEEP mode. If you need to replace the battery in the peripheral, switch the camera to CONFIG mode to avoid false alarms.
When detectors and wireless buttons are activated, camera makes Alarm event and informs the user by email, SMS, MMS, call or it sends information about the Alarm with video record to external JabloTool server.
Detectors
Detectors expand the area which camera monitors and also enable the camera to report additional events, e.g. Fire alarm generated by Fire and smoke detector.
Wireless fire (smoke and temperature) detector

Wireless fire detector JA-85 ST
The JA-85 ST detects the presence of fire inside a building. It reacts to visible smoke or when a critical temperature in the room is exceeded. It contains a built-in local warning siren. It is typically mounted on ceiling in a room or hall. The detector complies with EU Directives 98/34/ES and 98/48/ES stating the obligation to mount fire detectors in new buildings.
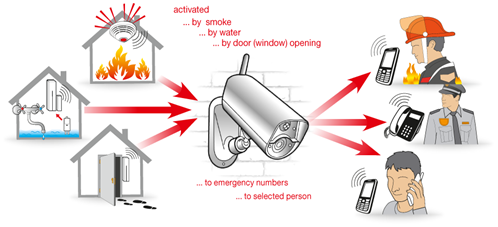
Example of use in cottage: Detector is activated by smoke and temperature caused by fire. Internal detector siren sounds and camera records video of the room inside. At the same time, the camera informs the user about Fire alarm by e-mail, MMS, SMS, call or by sending information to JabloTool Cloud.
Wireless magnetic detectors

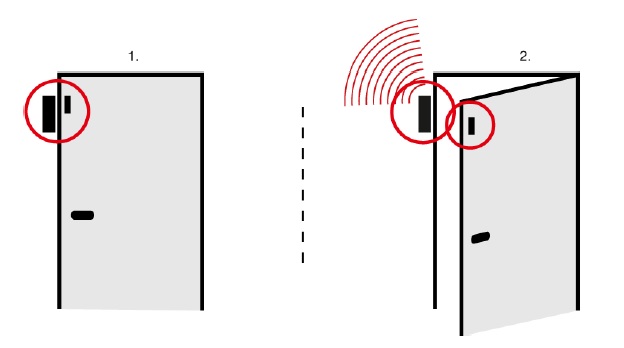
Wireless door/window detector JA-81M
Magnetic door/window detectors consist of two parts. There is a magnet in one of the parts and if both parts are moved away from each other (window or door is open), the detector is activated. It sends information to the camera which records video and informs the user.
Example of use in public premises: A user wants to have a list of people who entered a building. Opening the door causes an alarm event and the camera records video for selected time after the door was opened.
EYE-02 camera used with Magnetic door (window) opening detector JA-81M
You can connect by wires additional detector to the JA-81M. You can use any detector which connects or disconnects contact after its activation. Camera will record video and inform the user also after this additional detector is activated. JA-81M can be also used with flood detector LD-81 that signals flooding of rooms or cellars. For more information click here.
Example of use in protecting precious paintings: JA-81M is placed on the door leading to a room. Inside the room, there is a painting hanging on the wall. Detector connected by wires to JA-81M is placed under the painting. If someone opens the door, the door detector reports alarm to the camera. If someone removes the picture from the wall, the detector closes or opens its circuit and so it informs by wires the detector JA-81. This informs the camera and the user.
Other available types: Magnetic door detector JA-82M which is fit directly into door or window frames. The transmitter JA-80D has terminal point to which additional detector can be connected by wires. It does not have its own magnetic sensor.
Passive infrared (PIR) detectors
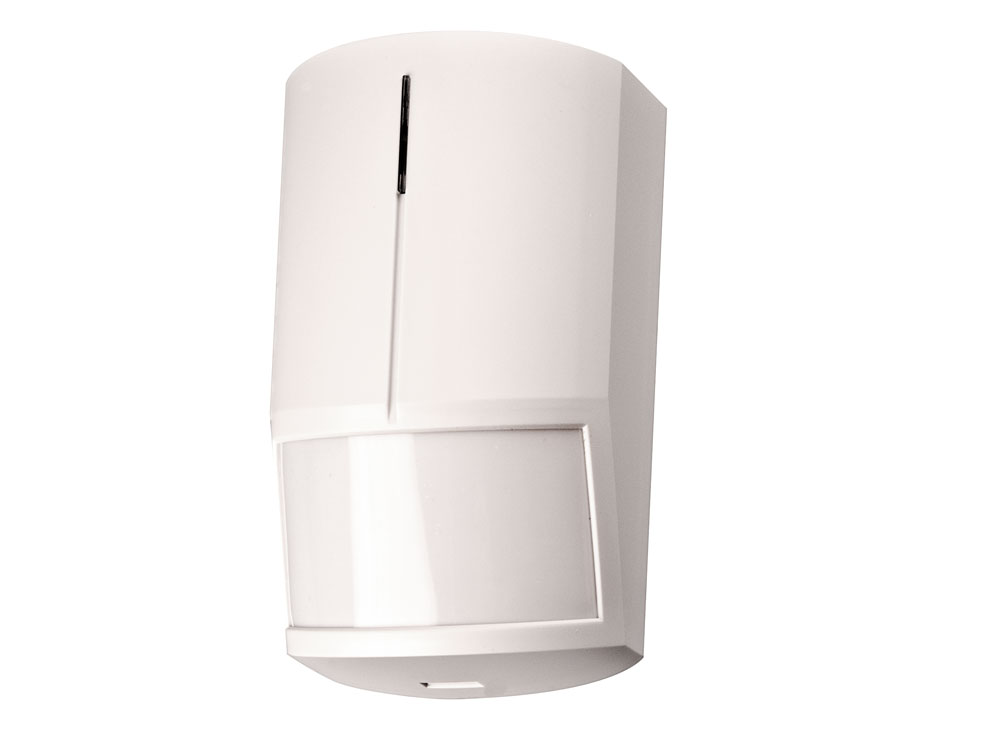
Passive Infra Red JA-80P
PIR detectors are activated by changes of temperature. This typically happens when a person or animal enters the detection zone. Connecting of additional PIR sensors allows extending of the monitored area for spaces that do not need to be monitored visually. External PIR sensors also extend the distance at which the camera can detect motion by passive infrared detection. Activation of PIR detectors causes Alarm. Camera records video and informs the user about the Alarm.
Example of use: Using detectors JA-80P to monitor motion in big factory hall. Several detectors can be used at the same time.
Other available types: JA-80PB is PIR detector combined with glass-break detector, suitable for areas accessible by breaking glass windows. JA-80W is PIR detector combined with microwave detector. When PIR detector registers movement, the MW detector is activated and confirms activation of the PIR detector. JA-86P is PIR detector with two PIR sensors inside Alarm is generated only when both sensors are activated. Suitable for areas where false alarms can be caused by small animals. JA-88P is PIR detector suitable for outdoor use. Detector is protected from dust and flushing water (IP55). JA-85P and JA-85B are mini-size PIR detectors. JA-82SH detects tilt and vibration of doors and windows.
Wireless gas leak detector
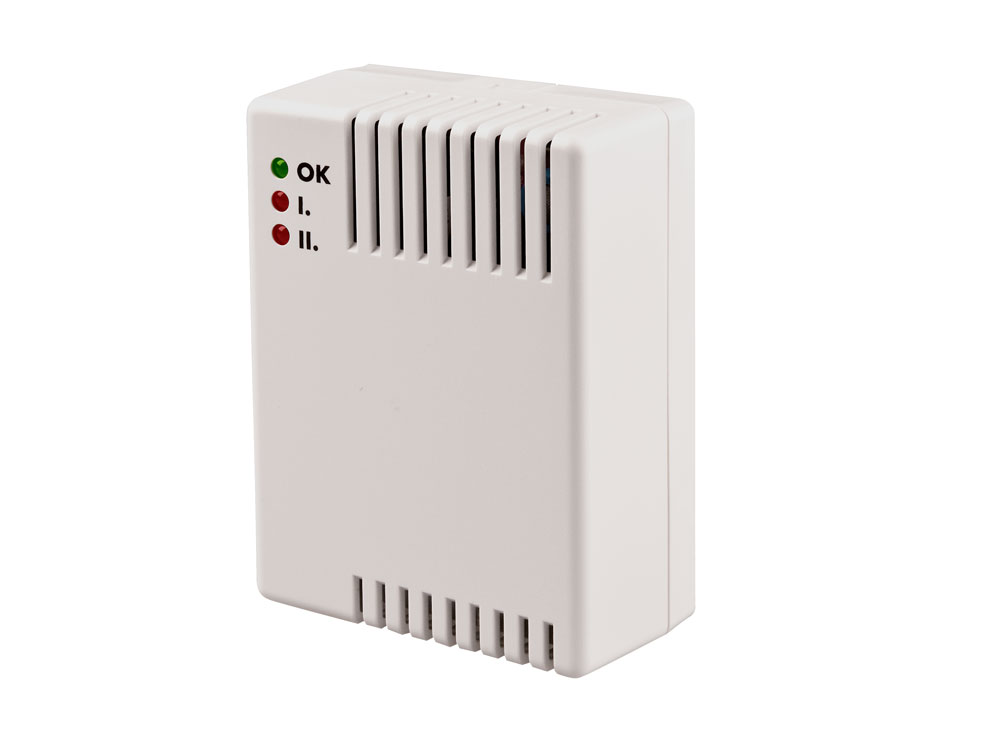
Wireless gas leak detector JA-80G
JA-80G is activated by combustive gases or fume leakages. This detector is mains-powered (230V AC) because of higher power consumption. It also provides a switch to shut down an electric gas inlet valve.
Example of use at home: Detector is placed in the room with gas heating. Gas inlet valve is connected by wires to the detector. If gas leaks, the detector reports this to the camera and camera generates Alarm. At the same time, the detector shuts down the gas inlet.
Wireless optical barrier
Wireless optical barrier JA-80IR
JA-80IR is optical barrier which indicates breach into a protected area by crossing the infra-red line between the transmitter and the receiver. It is a product of company Optex supplemented with transmitters compatible with OASiS system. There can be up to 60m distance between the units. The optical barrier can also be used outdoor, it is protected from dust and water.
Example of use at home: Optical barrier is placed along swimming pool on the garden. If a small child crosses the barrier, the camera will inform the parents about this by call and SMS.
Using camera with Fire detector, Flood detector and Door opening detector
Wireless switches
Camera EYE-02 is equipped with two virtual switches. These switches work as wirelessly sent commands to wireless switches to connect or disconnect their contact.
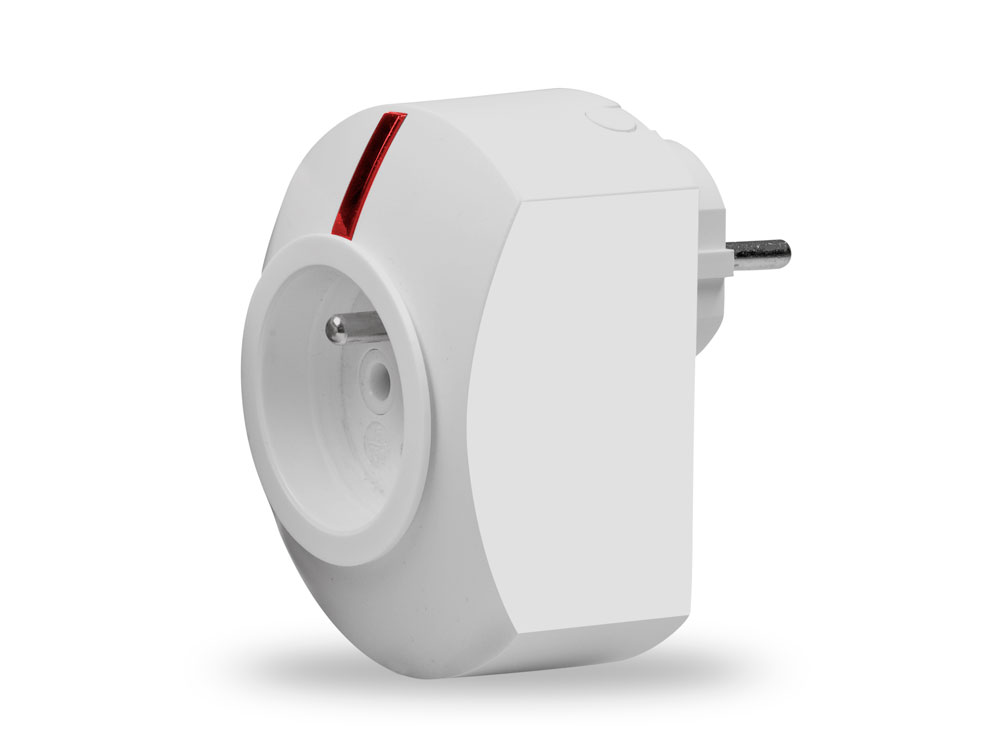
Wireless switch AC-88
Wireless socket AC-88 is a switch made as do-it-yourself solution. You can remotely turn ON and OFF all domestic appliances, lighting, heating, watering, etc. powered by the mains (AC 230V). It can be also used in the inverse mode – it disconnects contact when it is turned ON. Wireless socket can be also turned ON and OFF manually by pressing its button.
Other available types: UC-82, AC-82 and AC-83 are wireless switches in the shape of boxes into which wires of electric circuit are attached. UC-82 is powered by 12V DC power, AC-82 is powered by AC mains. AC-83 is suitable for use in heating systems. For more information go to www.jablotron.com.
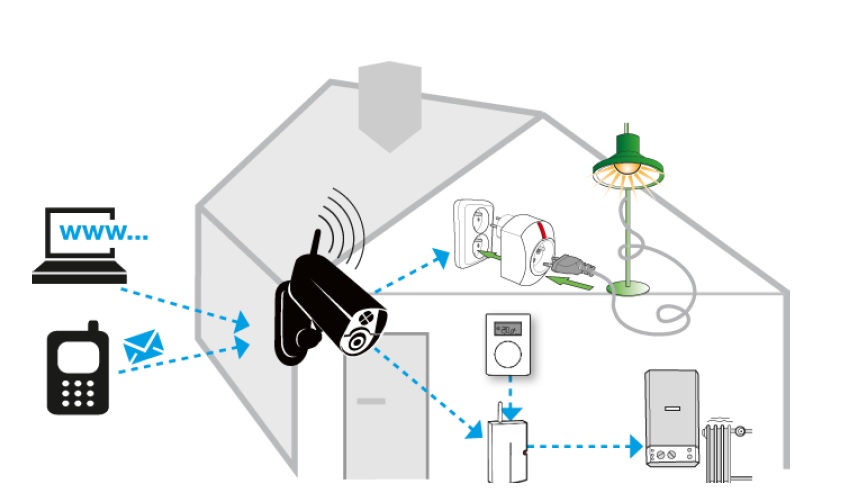
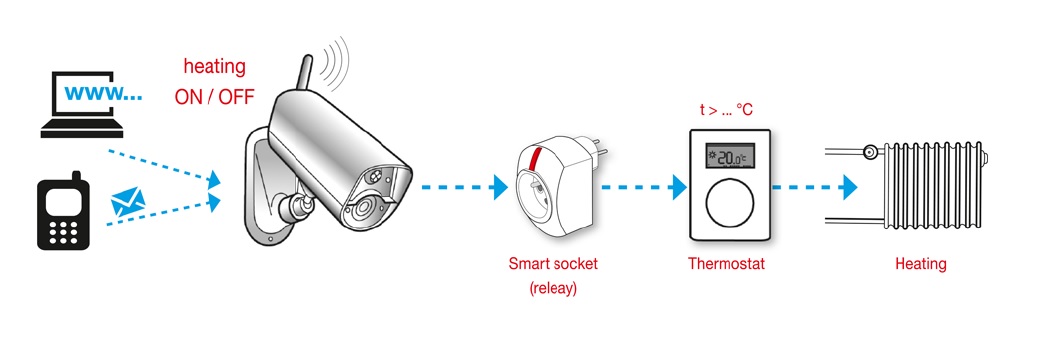
Using EYE-02 camera with smart socket, relay and thermostat
Use with garden watering: On your cottage you have a watering system with water pump placed in the well. You connect the power supply of the pump via the smart socket. Then you remotely turn on the sprinkler in your garden. You can adjust the time for which you turn ON the watering depending on the weather.
Use with thermostat: You leave home for a longer time. Before you return, you would like to have your home heated to comfortable temperature. You will use the smart socket together with thermostat TP-83. You will remotely turn ON the smart socket by the camera. The thermostat will then start controlling the socket. The socket will turn ON the heating if it receives such command from the thermostat. Your rooms will be heated to predefined temperature before you arrive. If you wish to maintain only minimum economical temperature you turn the wireless switch OFF.
Controlling and configuring the switches
Camera virtual switches send commands to the switches like wireless socket. Camera switches can be configured to several modes. Camera switches can be directly turned ON/OFF by the user or they can be configured to turn ON automatically when a predefined event happens.
SMS ON/OFF
Switch will turn ON or OFF after pressing a button in JabloTool or after sending an SMS command. You can specify the time for which the switch should be turned ON.
Example of use with watering: Switching garden sprinkler ON for 2 hours.
SMS (pulse)
Switch will turn ON for 2 seconds. Then it turns OFF again.
Example of use at home: You open entrance gate into the yard.
WATCH
Switch turns ON and will remain turned ON as long as camera is in WATCH mode.
Example of use as household protection: You automatically turn off domestic appliances by switching the camera into WATCH mode when you leave home. After you return you switch the camera into SLEEP mode and the appliances will turn on again. This minimizes the risk of fire when you are not at home and it reduces consumption of electricity. You need to set the smart socket to inverse mode so it disconnects contact when it is turned ON by camera.
Panic alarm
Switch will turn ON for 120 seconds.
Example of use in social care house: client presses wireless button. Smart socket turns ON the light in the room where patient pressed their wrist HelpMe! button. Camera will record video of the room at this moment.
Fire alarm
Switch will turn ON for 120 seconds.
Example of use in factory: Smart socket switches ON external high-capacity siren to signalize Fire alarm. Camera will record video in the hall where the wireless Fire detector was activated.
Alarm
Switch will turn ON for 120 seconds.
Example of use in shop: Smart socket switches OFF power supply to electric door locker so the door remains locked after Alarm.
Wake-up
Switch will turn ON for the predefined wake-up time. The time can be configured in JabloTool via USB > Configuration, General settings.
Example of use at home: Wireless socket switches ON lamp in courtyard when camera is woken-up. The camera does not report Alarm yet.
AC fault
Switch will turn ON and remain turned ON until AC power is recovered. Example of use in remote location: Smart socket turns ON diesel power generator after AC power failure.
Light ON
Switch will turn ON and remain turned ON as long as camera infrared illumination is turned ON.
Example of use at night: Smart socket turns ON external infrared illumination after camera activates its internal infrared illumination. This will increase the reach at which the camera can take pictures at night.
Camera switches can be configured and controlled in JabloTool via internet (www.jablotool.com, tab Peripherals), or via USB cable (tab Configuration, External devices). Switches can also be controlled by SMS commands if they are set to SMS ON/OFF or SMS ON/OFF (pulse) mode.
Example of SMS command: “<Remote Access Password> DeviceX ON” will switch the DeviceX ON) Example of SMS command: “<Remote Access Password> DeviceX ON 02:00:00” will switch the DeviceX ON for 2 hours.
Switches are called Devices in SMS commands. For more information on SMS commands see the camera manual.
Wireless buttons
Wireless buttons inform the camera and its user when a person presses them.
Remote control RC-86
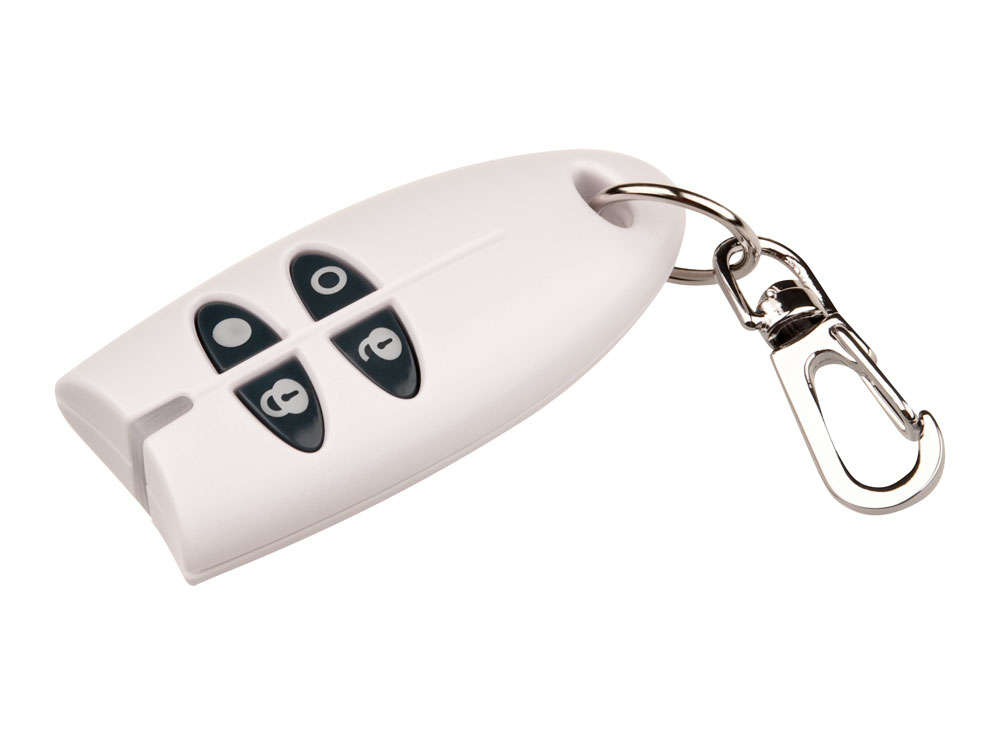
Wireless remote RC-86
Remote control can switch camera into WATCH, SLEEP, CONFIG and ENROL mode. User can also test camera internal detectors. This remote control is delivered with the camera. Additional controls allow more people to operate the camera independently. Other compatible types: RC-80.
Clicker
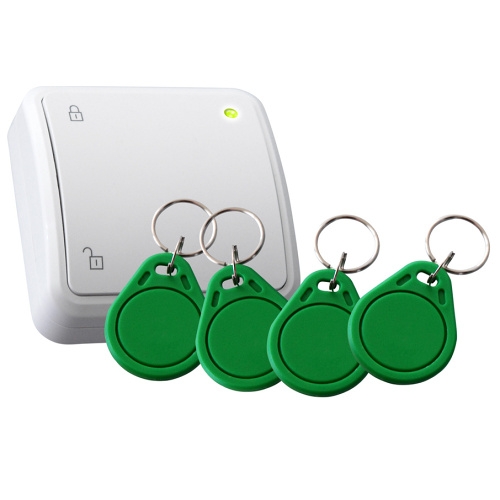
Clicker with PITs
Switch your camera to WATCH or SLEEP mode in a single “Click & Tap” step. The Clicker uses LEDs and beeper to signalize successful operation. Get everybody their personal tag (PIT). Up to 20 tags can be assigned to a single camera. You can buy clicker and PITs separately in our e-shop www.noabe.shop.
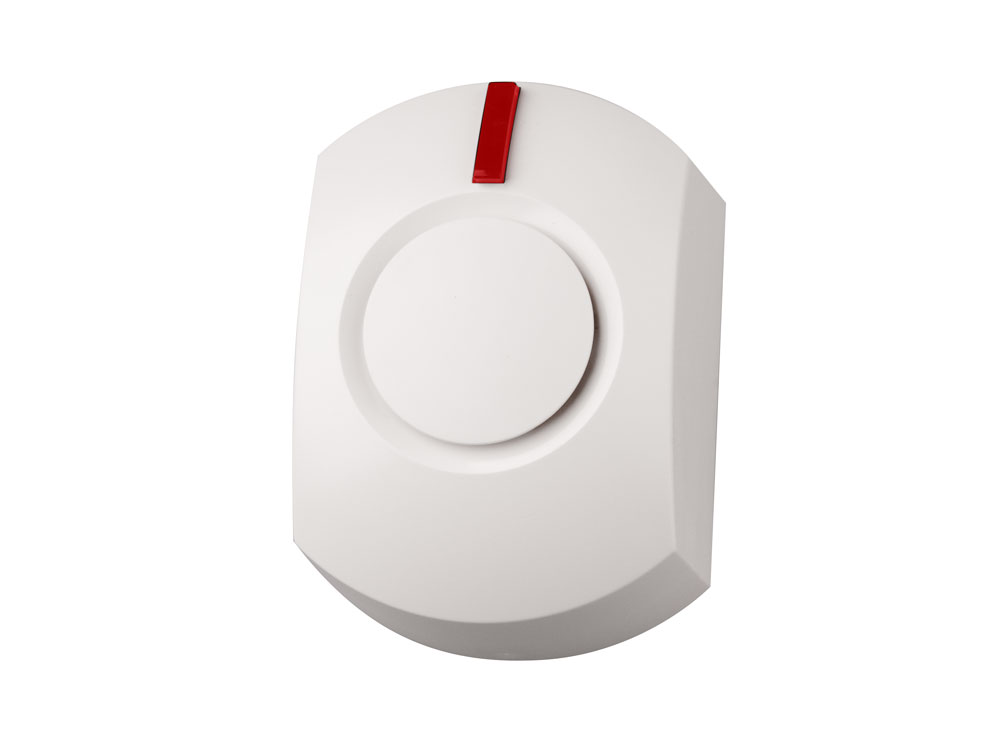
Wireless writst button RC-87
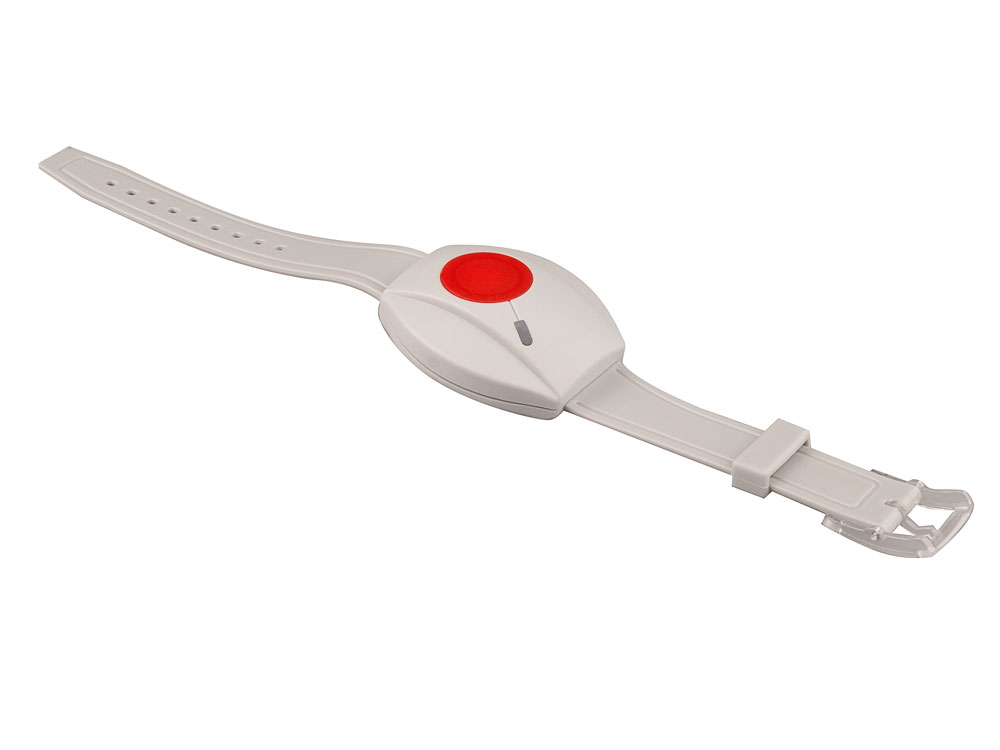
Help! button RC-87
Pushing the button causes Panic alarm even if EYE-02 is in SLEEP mode.
Example of use: Elderly people who may be in emergency due to sudden drop in their health condition simply press the panic button and the camera will report the Panic alarm via SMS, MMS, call, email or JabloTool server and contact parents, neighbours or hospital for help.
Other available type: wireless wall button RC-88
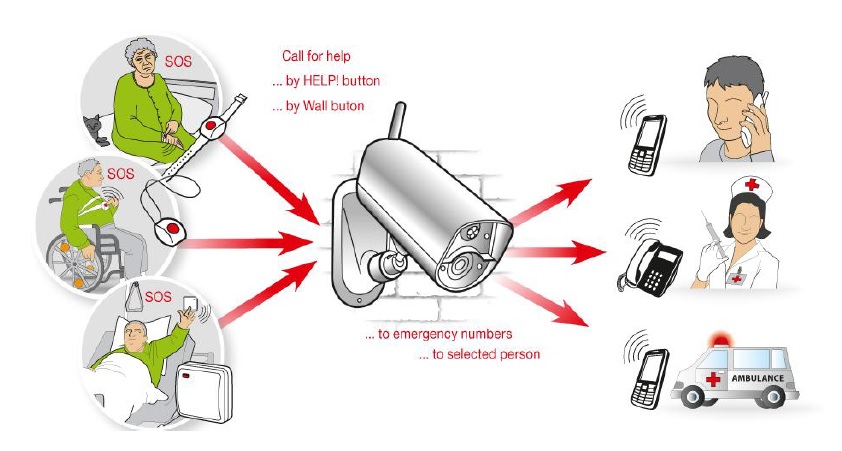
Using EYE-02 with wireless buttons RC-87 and RC-88
Wireless doorbell button RC-89
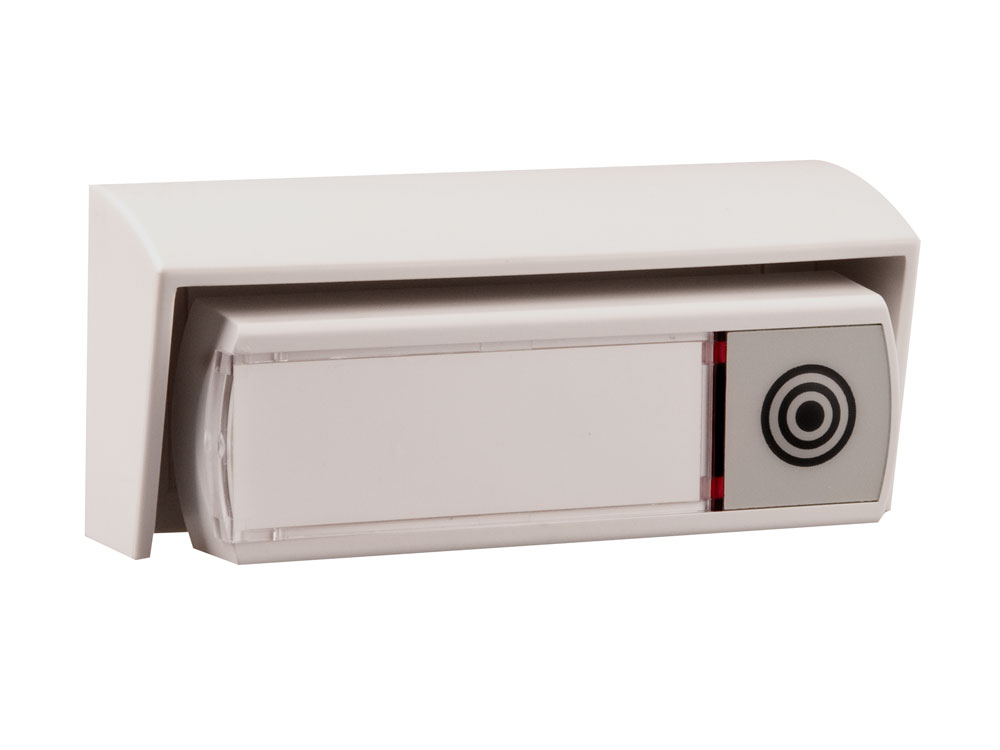
Doorbell button RC-89
Example of use: The camera is focusing on entrance area in a building. Pressing the doorbell button wakes the camera up. The camera then records video of entrance area. The button can be also configured to generate Panic alarm.
The doorbell button RC-89 can be used in combination with indoor siren JA-80L which sounds a melody after the doorbell button is pressed.
Sirens
The primary function of sirens is to inform visually and acoustically about Alarm events.
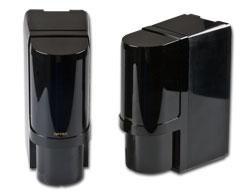
Wireless internal siren JA-80L
Indoor siren JA-80L
JA-80L is a mains-powered (230V AC) siren with multiple functions. It sounds when Alarm in the camera occurs. The sounding can be activated and its length adjusted between 0 seconds and 4 minutes (go to JabloTool, Settings, Peripherals, then click on the enrolled JA-80L). The same length of alarm indication applies to the siren JA-80A if it is enrolled in same the camera. The siren confirms intruder alarm to the camera when it is disconnected from power during the time while it sounds an Alarm.
Siren can signalize entrance or exit delay with a beep. Entrance and exit delay can be adjusted in JabloTool, tab Settings.
Detectors from the group RC-8x and JA-8x can be enrolled into the siren. The siren plays a melody after such detector is triggered. Different melodies can be associated with different detectors.
Example of use: Siren plays a melody after a (Doorbell button RC-89) at the entrance is pressed. The siren plays a different melody when that back door at home is open (Door detector JA-80M). The siren sounds Alarm when there is a fire in the kitchen (Fire and smoke detector JA-85ST). More detectors can be enrolled in the siren at the same time.
Wireless outdoor siren JA-80A
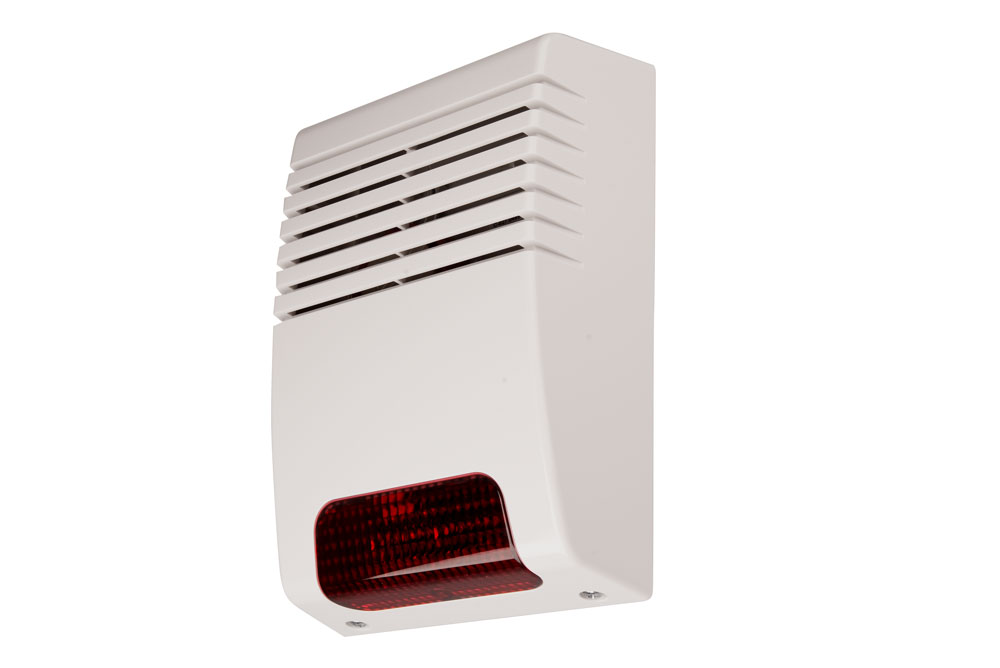
Outdoor siren JA-80A
JA-80A is completely wire-free siren in a solid housing. It signalizes intruder alarm acoustically and by red LED lights. The length of sounding in case of an alarm event can be set between 0 seconds and 4 minutes (go to JabloTool, Peripherals, then click on the enrolled JA-80A). If the internal siren JA-80L is also enrolled, it sounds alarm for the same period of time.
The siren is battery powered. Maximum battery lifetime is 3 years. Opening the cover signalizes unauthorized manipulation (Alarm) to the camera. LED lights keep flashing for 30 minutes after Alarm.
Thermostats
Thermostats control temperature in heated premises. They control a wireless switch and automatically switch it ON or OFF. If temperature in the room is lower than set temperature, the thermostat sends turns the wireless switch ON. The wireless switch connects contact and the heating turns ON.
Camera can be enrolled into wireless switch where thermostat is enrolled. Camera then works as a central switch. If camera turns the wireless switch OFF, the wireless switch will only connect contact when the temperature decreases below the economical temperature. If camera turns the wireless switch ON, the wireless switch will always follow the command from thermostat so the room will be heated to the selected temperature. To work like this, camera needs to be enrolled into the wireless switch and also thermostat needs to be enrolled into this wireless switch.
Thermostat can be also enrolled directly to the camera. Thermostat will then report to the camera
- when battery in the thermostat is flat
- when temperature decreases below preset level (event Panic Alarm is generated in the camera); this can indicate that heating system has stopped working or there may be danger that heating system will freeze.
- when temperature exceeds 60°C (event Fire Alarm is generated in the camera)
More thermostats can be enrolled into one wireless switch. Heating is then turned ON if at least one thermostat requires this.
Wireless thermostats TP-82, TP-83
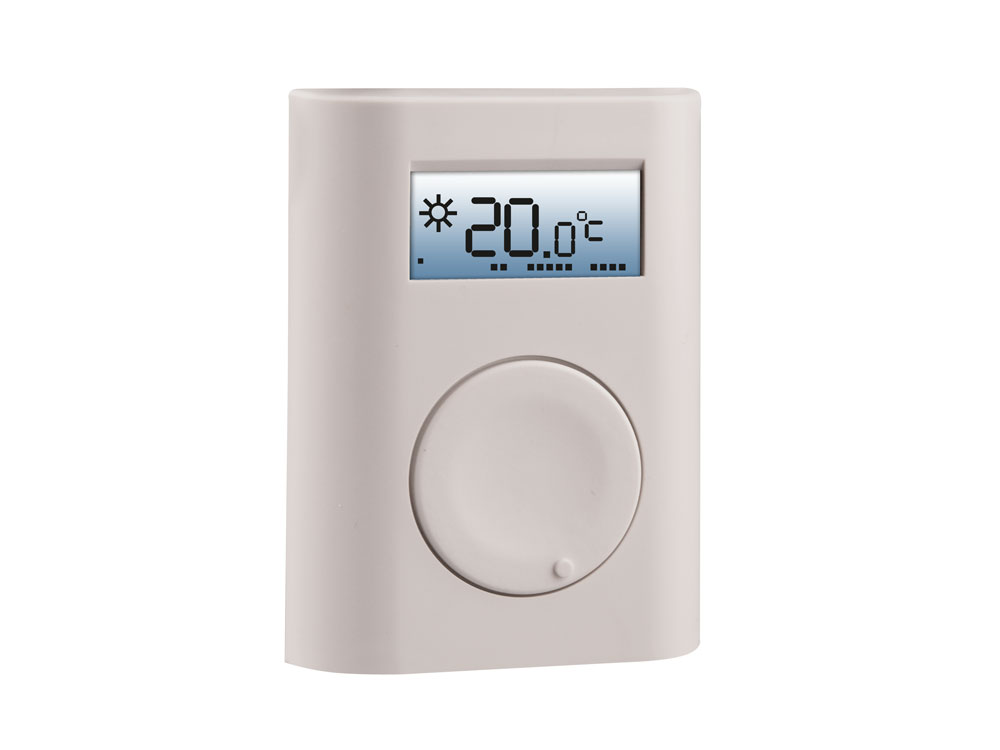
Wireless thermostat TP-83
Programmable wireless indoor thermostats TP-82 and TP-83 measure and set temperature that should be maintained in a room. Temperature adjustment is performed by turning the setting knob. Thermostats are enrolled into smart socket AC-88 or wireless switches AC-82, UC-82 and AC-83. These wireless switches then control the heating according to thermostat commands. The wireless switches can be then also enrolled into the camera so they can be remotely turned ON and OFF by the camera.
TP-83 has a programmable weekly heating schedule. You only set when you wish to achieve the selected temperature (e.g. on Friday evening) and the thermostat will begin to heat in advance so that your room is heated to the selected temperature at the selected time.
Wireless thermostat and camera scheme
JabloTool
JabloTool is camera management interface. In JabloTool you connect to your camera to see live picture from the camera, events in the history or to configure and control your camera. You can connect to your camera either via your account on the internet portal JabloTool (www.jablotool.com) or you can download JabloTool software from www.noabe.com/help/download/ and install it on your PC. Then you connect to your camera via USB cable.
Camera can report information from the detectors directly to the users by SMS, MMS, e-mail or voice call. In addition, you can activate reporting to JabloTool Cloud. Users then connect to the Cloud via internet and they can see events with pictures as camera reported them to the server in the past.
In order to use this possibility login to your JabloTool account on www.jablotool.com, select Settings, Change Data plan and confirm that camera can use data.
Enrolling peripherals
A peripheral and camera need to know each other so that they can communicate. The process when they get to know each other is called enrollment. Peripherals should be at least 1 meter away from the camera during enrolment. After you enroll wireless peripheral the camera leaves Enroll mode. Switch the camera into Enroll mode again to enroll next peripheral.
Switching camera into Enroll mode in JabloTool
- Connect to your camera with JabloTool – either via internet portal (or via JabloTool installed on your PC)
- Go to tab Peripherals (or Configuration, External devices)
- Click on Add new device
Switching the EYE-02 camera into Enroll mode with remote control
- Press simultaneously both buttons in the right column
- Press button with the symbol “+”
Procedure of enrolling peripherals is described separately step by step for each type of peripherals. Enrolled peripherals can be further configured in JabloTool. Wireless peripherals are described in more detail in user manual of each peripheral on www.jablotron.com.

Enrolling detectors
- Go to JabloTool.com, tab Peripherals and click on Add new device. This will switch the camera into Enroll mode. Other possibilities of switching camera to Enroll mode are described in the previous chapter.
- Insert battery into your detector: JA-80D, JA-80IR, JA-80M, JA-80P, JA-80PB, JA-85ST, JA-80W, JA-81M, JA-82M, JA-82SH, JA-85B, JA-85P, JA-86P, JA-88P or
- plug the detector into the mains if you have detector JA-80G.
Enrolling wireless switches
Enrolling smart socket AC-88
-
First reset the socket. You can skip this step if no other device is enrolled in the smart socket.
- Unplug the socket from the mains and plug it in again. The LED indicator will turn ON for about two seconds.
- Before the LED turns OFF press and hold the button on the socket until the LED indicator flashes four times in intervals.
- Release the button to enter the reset mode.
- To perform the reset press the button and hold it again until the LED indicator goes off (approx. 3 seconds)
- Unplug the socket from the mains
- Plug the socket into the mains, LED indicator will turn ON for about two seconds.
- Before the LED turns OFF again press and hold the button on the socket
- until the LED indicator flashes once in intervals – the socket enters the Switch ON (normal) mode. The socket will connect contact if camera switch is turned ON,
- or wait until the LED indicator flashes twice in intervals – the socket enters the Switch OFF (inverse) mode. The socket will disconnect contact if camera switch is turned ON. It will connect contact if camera switch is turned OFF.
- Send the enrollment signal from the camera.
- Go to JabloTool. Select Settings, Peripherals and click on Add new device. Wait for several seconds. When camera sends enrollment signal the socket will flash twice quickly. Camera enrolls into the socket. Or
- go to JabloTool via USB, click on the icon of camera in the list of on-line devices, go to Configuration, External devices and click on Add new device.
When camera sends enrollment signal the socket will flash twice quickly. This confirms that camera enrolled into the socket. Socket will enroll into DeviceX. To enroll socket into DeviceY send enrollment signal twice in interval of two seconds. Use JabloTool via USB.
- Press the button on the socket to exit its enrolment mode. Socket will stop flashing.
- In Jablotool go to Settings (Advanced), Programmable outputs. Turn the switch of DeviceX or DeviceY ON. Now the smart socket will respond to switching ON or OFF the camera switch (DeviceX or DeviceY).
Note: Do not use remote control to switch the camera in the Enroll mode when socket is in Enroll mode because the remote control would then enroll into the socket.
Enrolling relays AC-82 and UC-82
- First reset the wireless switch. You can skip this step if no other device is enrolled in the relay
- Undo the cover and repeatedly press the button of the first wireless switch (X), achieve the highest number of LED flashes (4, or if not possible, then 3)
- Press the same button and keep it pressed until all the LEDs flash a couple of times (=reset)
- Repeat the reset procedure with button of the second wireless switch (Y)
- Enroll the camera into wireless switch X or Y. Repeatedly press the relevant X or Y button until LED No. 4 starts to flash.
- Send the enrolment signal from the camera in JabloTool.com, select Settings, Peripherals and click on Add new device.
Wireless switch will now respond to wireless instructions of camera virtual switches. If you enrolled the camera into the first wireless switch (X), the wireless switch will be controlled by camera switch DeviceX. If you enrolled the camera into second wireless switch (Y), the wireless switch will respond to instructions of the camera switch DeviceY.
Enrolling relay AC-83
- First reset the wireless switch. You can skip this step if no other device is enrolled in the relay.
- Undo the cover and repeatedly press the button of the first wireless switch (X) to achieve several LED flashes
- Continuously press the same button and keep pressing it (for approx. 4 seconds) until all the LEDs flash a couple of times (= reset). Then release the button.
- Repeat the reset procedure with button of the second wireless switch (Y)
- Enroll the camera into the wireless switch X or Y. Use the X or Y button depending on to which wireless switch you want to enroll the camera. Enter enrollment mode of wireless switch (this is indicated by red LED No. 2 or 4 flashing) by pressing its button X or Y.
- Send the enrolment signal from the camera in JabloTool.com: select Settings, Peripherals and click on Add new device.
Enrolling wireless buttons
- Switch the camera into Enroll mode. Go to JabloTool via internet, select Settings, Peripherals and click on Add new device.
- Press (any) button on wireless button: RC-80, RC-85, RC-87, RC-88, RC-89, or
- Enroll Clicker: pull the red tab from the back side of the Clicker, or
- Enroll PIT: press Clicker (either way) and tap the PIT on the Clicker.
Enrolling sirens
Siren should be at least 2 meters away from the camera during enrolment.
Enrolling JA-80L
- Switch camera to Enroll mode (follow steps here)
- Reset the siren if it has been previously enrolled in another device
- Unplug the siren from the mains socket.
- Press and hold the siren button and plug the siren in the mains socket.
- Keep the button pressed until two beeps are heard which confirms a reset.
- The indicator of siren keeps flashing after reset (device is in enrolment mode). Siren will enroll into the camera.
Enrolling JA-80A
- If another device has been previously enrolled in the siren reset the siren by unplugging its battery.
- Switch the camera into Enroll mode in JabloTool.com: Select Settings, Peripherals and click on Add new device.
- Insert battery into the siren.
The siren stops flashing after it is enrolled.
Using wireless switch with both camera and thermostat at the same time
If you want to use wireless switch with both thermostat and the camera you need to enroll thermostat into the switch first then you can enroll the camera into the switch. Follow these steps.
- Enroll the thermostat into the controlling wireless switch
- Reset the wireless switch AC-82, UC-82 or AC-83
- Switch the wireless switch into enroll mode
- AC-82 or UC-82: Repeatedly press the relevant X or Y button of the wireless switch, achieve the highest number of LED flashes (4, or if not possible, then 3)
- AC-83: press the button X or Y, enroll mode is indicated by red LED number 2 or 4 flashing.
- Insert battery into the thermostat TP-82 or TP-83.
- Enroll the camera into the controlled wireless switch.
Enrolling thermostats into EYE-02 camera
- Switch the camera into Enroll mode (follow steps here).
- Insert battery into the thermostat TP-82 or TP-83.
Enrolling thermostats and camera into wireless socket AC-88
- First reset the socket. You can skip this step if no other device is enrolled in the socket.
- Plug the socket into the mains. LED indicator will turn ON for about two seconds.
- Before the LED turns OFF, press and hold the button on the socket until the LED indicator flashes once in intervals.
- Insert battery into the thermostat TP-82 or TP-83
- Press the socket button to finish the enrollment mode.
- Unplug the socket from the mains
- Plug the socket into the mains. LED indicator will turn ON for about two second.
- Before the LED turns OFF, press and hold the button on the socket until the LED indicator flashes once in intervals.
- Send the enrolment signal from the camera in JabloTool.com: select Settings, Peripherals and click on Add new device.
The wireless socket will now connect contact if thermostat gives command to increase the temperature.
 Podpora pro kamery EYE-02 v češtině